

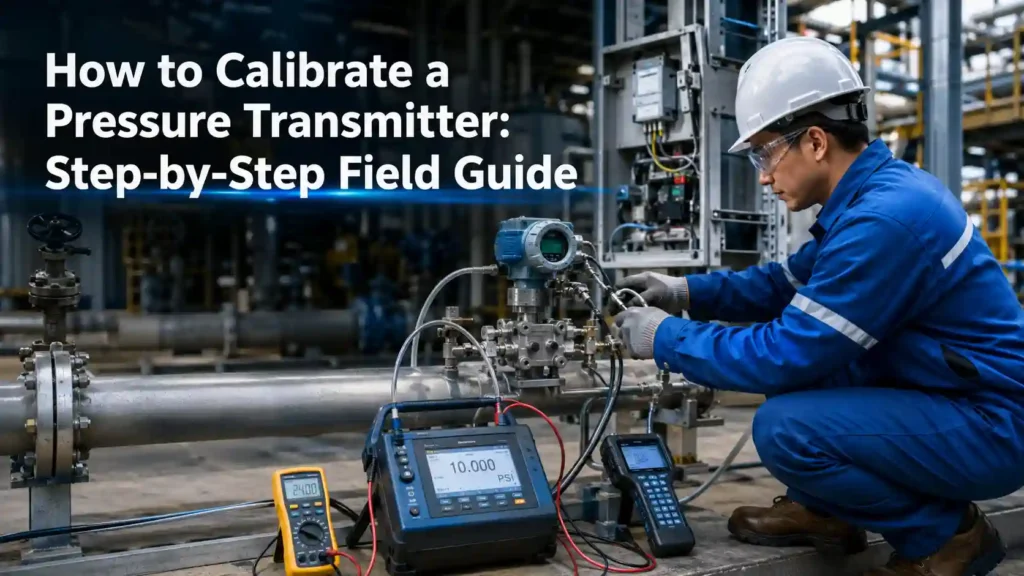
Pressure transmitter calibration is essential for maintaining accurate process measurements, ensuring operational safety, and minimizing costly downtime. Whether you’re working in oil & gas, water treatment, pharmaceuticals, or manufacturing, knowing How to Calibrate a Pressure Transmitter: Step-by-Step Field Guide helps maintain reliable process instrumentation and compliance with industry standards. Regular field calibration also detects measurement drift before it affects production quality or equipment performance. This guide explains the complete calibration procedure, recommended tools, common mistakes, and best practices used by instrumentation professionals in the field.
Why Pressure Transmitter Calibration Matters
A pressure transmitter converts process pressure into an electrical signal used by control systems. Even minor measurement errors can impact production efficiency and product quality.
Proper Pressure Transmitter Calibration offers several benefits:
- Improves measurement accuracy
- Enhances process safety
- Ensures regulatory compliance
- Reduces unexpected equipment failures
- Extends instrument service life
- Supports reliable process automation
Routine instrument calibration is especially important in industries where precise pressure measurement directly affects production consistency and operational safety.
Tools Required for Pressure Transmitter Calibration
Before starting the calibration procedure, gather the appropriate calibration equipment.
Typical tools include:
- Pressure Calibrator
- Hand Pump (Pneumatic or Hydraulic)
- Digital Multimeter
- HART Communicator (for smart transmitters)
- Reference Pressure Gauge
- Stable DC Power Supply (24 VDC)
- Calibration Manifold
- Certified Test Leads and Hoses
- Personal Protective Equipment (PPE)
Using certified calibration equipment improves measurement confidence and helps generate accurate calibration certificates.
How to Calibrate a Pressure Transmitter: Step-by-Step Field Guide
Step 1: Review the Transmitter Specifications
Check the transmitter’s pressure range, output signal (typically 4–20 mA), accuracy class, and manufacturer’s calibration recommendations before beginning.
Step 2: Isolate the Transmitter
Safely isolate the pressure transmitter from the live process. Depressurize the line and follow plant lockout/tagout procedures to ensure technician safety.
Step 3: Inspect the Instrument
Visually inspect the transmitter, impulse lines, fittings, and wiring for leaks, corrosion, mechanical damage, or loose connections that could affect calibration results.
Step 4: Connect Calibration Equipment
Connect the pressure calibrator, hand pump, and digital multimeter according to the calibration setup. For smart transmitters, connect a HART communicator if configuration verification is required.
Step 5: Apply Zero Pressure
Apply zero pressure while monitoring the output signal. A properly functioning transmitter should indicate approximately 4 mA at the lower range value.
Step 6: Perform Zero Adjustment
If the output deviates from the expected value, adjust the zero setting according to the manufacturer’s instructions until the correct output is achieved.
Step 7: Apply Span Pressure
Increase pressure to the upper range value using the pressure calibrator. The transmitter output should reach approximately 20 mA or the configured engineering value.
Step 8: Perform Span Adjustment
Adjust the span only if the measured output falls outside the allowable tolerance. Recheck both zero and span after making adjustments, as changes can affect each other.
Step 9: Check Linearity
Apply several intermediate pressure points, such as 25%, 50%, and 75% of the calibrated range. Verify that the transmitter output remains consistent across the full measurement range.
Step 10: Verify Calibration Accuracy
Compare all readings with the reference standard and confirm that errors remain within the manufacturer’s specified accuracy limits.
Step 11: Document Calibration Results
Record:
- As-found readings
- As-left readings
- Zero and span adjustments
- Calibration equipment used
- Technician details
- Calibration date
- Calibration certificate information
Proper documentation supports maintenance planning and compliance audits.
Step 12: Return the Transmitter to Service
Disconnect the calibration equipment, restore all process connections, remove isolation, and verify normal transmitter operation before returning the instrument to production.
Common Calibration Mistakes to Avoid
Avoiding these common errors improves calibration reliability:
- Using uncertified reference equipment
- Skipping zero adjustment
- Ignoring ambient temperature effects
- Calibrating without isolating the process
- Testing only zero and full-scale pressure
- Incomplete documentation
- Neglecting post-calibration verification
These mistakes can introduce inaccurate pressure measurement and lead to unnecessary process interruptions.
Best Practices for Pressure Transmitter Calibration
Following proven field practices improves long-term instrument performance.
- Follow manufacturer calibration procedures.
- Use recently certified calibration equipment.
- Maintain preventive calibration schedules.
- Keep detailed calibration records.
- Train technicians on updated calibration methods.
- Verify calibration after repairs or component replacement.
- Store calibration certificates for audit and maintenance purposes.
Consistent calibration best practices reduce maintenance costs while improving process reliability.
When Should You Calibrate a Pressure Transmitter?
Calibration frequency depends on process criticality, operating conditions, and industry regulations.
Common situations include:
- During scheduled preventive maintenance
- Immediately after installation
- Following repairs or replacement
- When abnormal process readings occur
- To meet regulatory or quality standards
- Before commissioning critical process equipment
Facilities operating in harsh environments or critical applications often require more frequent instrument calibration.
Conclusion
Accurate pressure measurement is fundamental to safe and efficient industrial operations. Following How to Calibrate a Pressure Transmitter: Step-by-Step Field Guide helps engineers and technicians maintain reliable instrumentation, improve product quality, and reduce unexpected process downtime. Using certified calibration equipment, following structured field procedures, and maintaining complete calibration records all contribute to consistent performance. For organizations seeking dependable industrial instrumentation, process automation products, and technical expertise, IPS Automation provides a comprehensive range of pressure transmitters, calibration-related solutions, and engineering support to help keep industrial processes accurate, reliable, and efficient.
Looking to improve the accuracy and reliability of your process instrumentation? Explore IPS Automation’s range of pressure transmitters, differential pressure transmitters, instrumentation accessories, and industrial automation solutions backed by technical expertise to support efficient and dependable plant operations.